Midjourney Prompt Writing Guide for Consistent Images

Create Better Midjourney Images: A Creator’s Writing Guide
Great results come from clear intent, strong visual direction, and a repeatable method. This guide breaks down how to describe scenes, styles, lighting, and composition so Midjourney produces more consistent, portfolio-ready images. For parameter definitions and feature updates, check the official Midjourney Documentation and the Midjourney Help Center. For more guidance, see 15 Tips to Help Your Midjourney Prompts | +Free Prompting Guide.
What Changes the Output Most
Small wording choices can swing results dramatically, but a few levers matter more than the rest:
- Subject clarity: define who/what is in frame and what they’re doing (not just what it “looks like”).
- Context and environment: location, era, weather, materials, and mood help the scene “lock in.”
- Visual language: lens, framing, lighting, palette, and texture control the read at a glance.
- Style references: pick art movements, mediums, or production design cues that reinforce your intent.
- Iteration strategy: change one variable at a time to learn cause-and-effect instead of guessing.
A Simple Recipe for Consistent Image Directions
When results feel random, it’s usually because the description isn’t structured. Use a repeatable build:
- Start with a one-line concept: subject + action + setting.
- Add 3–5 visual qualifiers: lighting, palette, mood, medium, and detail level.
- Specify composition: shot type, camera angle, and the focal point.
- Add constraints: what must be avoided (text, extra limbs, watermark-like artifacts, clutter).
- Finish with settings: aspect ratio and other controls only after the description reads cleanly.
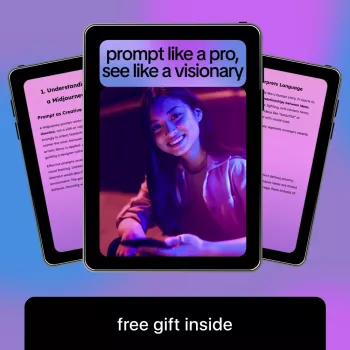
If you want a compact reference you can reuse across projects, the Prompt Like a Pro, See Like a Visionary – Midjourney Prompt Guide for Creators | Learn how to write a good midjourney prompt is designed for repeatable, creator-friendly workflows.
Make Subjects Readable: People, Products, Creatures, and Characters
Most “almost right” images fail because the subject isn’t readable fast enough. Tighten identity first, then pose, then materials.
People and portraits
- Define identity: age range, wardrobe, silhouette, and one or two distinguishing marks (scar, hairstyle, jewelry).
- Use action verbs: standing, sprinting, reaching, leaning, floating—verbs imply posture and gesture.
- Keep it coherent: avoid contradictions like “minimalist” plus “ornate filigree everywhere.”
Product and editorial-style shots
- Surface and reflections: glossy acrylic, brushed metal, matte paper, soft reflections, specular highlights.
- Background sweep: “clean studio sweep,” “seamless backdrop,” or “floating on white” for usability.
- Display context: in-hand scale, tabletop flat lay, hero shot on pedestal, or lifestyle placement.
Creatures and characters
- Anatomy constraints: call out limb count, symmetry, and any “must not change” body feature.
- One priority feature: choose the single most important trait (antlers, translucent wings, ceramic skin).
Control the Scene With Lighting, Color, and Atmosphere
Lighting and palette do more than add beauty—they set the emotional logic of the image. Once that logic is consistent, variations feel intentional.
- Lighting: golden hour warmth, overcast softbox look, rim light separation, neon bounce, candlelit chiaroscuro.
- Color: limited palette, complementary accents, monochrome with one highlight color for instant hierarchy.
- Atmosphere: fog density, film grain, dust motes, volumetric rays, rain and wet surfaces for sheen.
- Material realism: metal roughness, subsurface scattering for skin, fabric weave detail, micro-scratches.
- Mood consistency: keep emotional tone aligned—moody lighting with playful candy colors often fights itself.
When creative sessions feel scattered, a quick mindset reset can help maintain consistency across iterations; Daily Affirmations for Abundant Wealth | Audio Course | Money Mindset & Prosperity | Abundance Manifestation can be a simple background routine while refining sets.
Composition and Camera Language That Works
Composition is your “delivery system.” If the framing is wrong, even great styling won’t land.
- Framing: close-up for texture, medium shot for gesture, wide establishing shot for world-building, overhead flat lay for product clarity.
- Lens cues: wide-angle drama for dynamism, portrait compression for flattering faces, macro for detail emphasis.
- Depth of field: tack-sharp editorial when you need readability; creamy bokeh when you need separation.
- Design principles: leading lines, rule of thirds, and negative space for layouts and cropping flexibility.
- Usability requests: ask for clean backgrounds and clear subject separation when the image must be placed into designs.
Settings That Steer Results (Quick Reference)
Settings are most powerful after the description is stable. Use them to refine composition tendencies and repeatability, not to rescue a confusing direction.
Common Settings and When to Use Them
| Setting | What it influences | Good for | Watch-outs |
|---|---|---|---|
| Aspect ratio | Canvas shape and composition tendencies | Posters, banners, thumbnails, social formats | Can change subject placement and perceived scale |
| Stylization | How strongly the model injects its own aesthetics | Concept art, painterly looks, mood exploration | Too high can override specific details |
| Seed | Repeatability of a visual direction | Character consistency and controlled iteration | Small wording changes can still shift outputs |
| Quality | Time/detail emphasis in the render | Textures, product detail, fabric and materials | Higher values cost more time/credits |
| Negative terms | Reduces unwanted elements | Avoiding text, extra limbs, clutter, watermarks | Overuse can remove useful detail if too broad |
A Creator-Friendly Iteration Workflow
Consistency is less about “finding the perfect line” and more about running predictable rounds:
Common Pitfalls and Fast Fixes
A Compact Writing Toolkit for Midjourney Creators
For a ready-to-use toolkit in a single download, visit Midjourney image-writing guide for creators (digital download).
FAQ
How long should the text description be for reliable results?
Keep a concise core line (subject + action + setting) and add a short list of high-impact visual qualifiers. Prioritize the top details and remove contradictions so the direction stays clear.
How can character consistency be improved across multiple images?
Reuse seeds when refining, repeat defining traits (wardrobe, silhouette, key marks), and keep camera/framing stable. Change only one variable per round so you can identify what caused the shift.
What helps reduce unwanted text or strange artifacts?
Explicitly forbid text, signatures, logos, and watermark-like marks, and simplify the scene to reduce clutter. Use negative terms carefully so you don’t accidentally remove useful details.


Leave a comment